Overnight Steel Cut Oatmeal in a Jar

Steel Cut Oatmeal Ready to Eat in 5 Minutes When You Make it This Way

3-Steel Cut Oatmeal up close

Steel Cut Oatmeal

A few days ago I was organizing my pantry and I found a can of Steel Cut Oats that I purchased almost a year ago. I thought I better use this or it will be going into the trash. I’m not sure really why I bought it because I don’t  like oatmeal. I don’t hate it but it’s not something I crave.

When I looked on the can I saw that it took around 30 minutes to cook. Sure, I’m going to get up in the morning before work and cook something I don’t really like for 30 minutes (not going to happen). Then, I noticed on the can a variation on the cooking method. It said to boil water, add oats, and then simmer for a few minutes. After simmering put the pan in the refrigerator overnight and cook for a shorter time in the morning.

I’ve seen pictures of oatmeal in jars around the net but never paid much attention. I thought, I’ll make the oatmeal per instruction on the can and put it in jars and see how it works. Seemed much nicer than putting the whole pan in the refrigerator.

Here is how I made my oats in a jar.

Oatmeal in a jar

Ingredients:
1 cup steel cut oats
4 cups water
pinch of salt

Directions:

Wash 4 pint size mason jars

4-Clean Mason Jars

Add 4 cups of water to a pan and bring to a boil.

When the water is boiling add 1 cup of Steel Cut Oats

1-measuring cup oatmeal

Simmer the oats for 4-5 minutes

2-Cooking oatmeal

This is what it looks like when you take it off the stove

5-Oatmeal ladled into jars

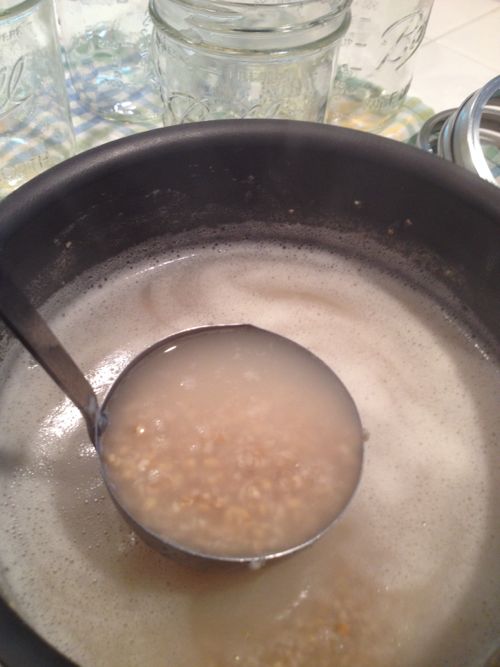
Ladle the hot oats into clean jars

6-Filling the mason jars with oatmeal

Put the lids on and let them sit on the counter until they cool. I left mine on the counter for an hour. Easy Peazy!

Oatmeal in a jar


When the jars are cool pop them into the refrigerator and forget about them

8-jars of oatmeal in frig

When you are ready for some warm hearty oatmeal grab a jar from the refrigerator.

This is what it looks like right out of the refrigerator.

9-oatmeal just out of the frig

Microwave for 5 Minutes

Take the metal lids off and cover with a paper towel or wax paper, then microwave for 5 minutes. Make sure to stir the oatmeal around the 2 minute mark to keep the oatmeal from frothing out the top of the jar. You may have to stir a few times, at least I did.

Gather Your Favorite Oatmeal Toppings

I used Maple Syrup, chopped pecans, half & half, raspberries, and my husband added raisins.

10-maple syrup and rasins

You can eat it right out of the jar or put it into bowls. I vote for the jar; who wants to wash another dish.

11-Cooked oatmeal in a jar

The oatmeal tasted really good. It was kind of nutty tasting, maybe that is because I added a few nuts. I think I prefer the flavor of brown sugar over maple syrup, plus it’s easier to take to work. My husband loved it and said it was something I should make again. Thankfully I have 3 more jars in the refrigerator. Having it ready to pop into the microwave is a big bonus in my book.

One jar was plenty for both my husband and myself; it’s very filling.

This would be a great thing to have on hand for overnight guests during the holiday season or anytime. Each person can make their own oatmeal when they want. Much better than the packet of instant stuff.

Have you ever made oatmeal like this before? Share your experience and thoughts. What are your favorite additions to oatmeal? I’m thinking dried cherries or cranberries would be great this time of year.

bon appétit,
Tamara Maellaro

Halloween Chalkboard Art

Happy Halloween

The other day when I was filming in downtown Los Angeles I went into a Starbucks and they had a picture on the wall. I’m not sure if it was a picture of chalkboard art, or if someone actually did it with chalk. The picture was on the other side of the store, the line was long, and I was in a hurry so I didn’t walk over to it. I liked the way it looked so I snapped a picture of it. 

Chalk art

The picture I saw at a Starbucks was my inspiration for the chalkboard art I did in my Koffice (kitchen office). I love chalkboards and I use mine often for notes and holiday art.  My chalkboard  has special meaning to me because it was my daughter’s when she was a little girl.

Here is my attempt at drawing with chalk

Halloween chalkboard Art

Wishing you a safe and happy day!

Tamara Maellaro

Friendship Tea ~ A Sweet Little Gift

Fall is quickly approaching which means all the holidays will be here soon. And with the holidays comes gift giving. September makes me want to get out my sewing machine, make cards, bake, and all that other crafty stuff. It just makes me feel good.

As I was feeling all crafty and creative I was also writing the Billy Gorilly Family Newsletter. I wanted to include Family Friendly recipes that the kids could help make, and wouldFriendship Tea from BillyGorilly.com Music and Fun for Kids also be perfect for gift giving. As I was thinking, I remembered “Friendship Tea”.  My mother-in-law was the first one to share this recipe with me many years ago. I have fond memories of this special tea. She did not have much money, but she always gave very thoughtful loving gifts. I knew that this gift was from her heart, and her way of showing us how much she cared. I would be reminded of her love over and over until I finished the last bit of tea mix.

This recipe is easy to make and I’ve included a gift tag template

My husband also loves this tea. When I was taking pictures of the finished product my husband asked if he could have some, so I made him a cup of “Iced Friendship Tea” garnished with a slice of lemon. His response was “yum this is really good, can I have some more”. After 2 glasses of tea I did what any good wife would do and reminded him that this does have sugar, so drink accordingly.

Friendship Tea would be a perfect thoughtful little gift for your girlfriends, teacher, hostess, or just about anyone.

You can store the mix in clean recycled glass  jars, or purchase fancy jars. Just make sure the jars have airtight lids. I created gift tags (my gift to you) to adorn the jars, which include instructions on how to make the tea . Tie the tag to the jar with a ribbon and you are set to go.

Ingredients you will need: Print Recipe Card and Gift Tags
Tea Powder
Lemonade mix
Orangeade mix
Cinnamon & Clove
Containers to store mix
Printer for gift tags and recipe card (optional)

Mix ingredients in large bowl, then store in airtight containers. How easy is that!

Kids will have fun stirring the ingredients, learning how to measure, and about sharing with others.

Click Image to get recipe at BillyGorilly.com

Download and Print Recipe and Gift Tag Template

I hope you enjoy making this as much as I do.

Be well,


No Cook Chia Seed Pudding

I’ve been hearing a lot of talk about Chia seeds lately and I really didn’t think much of it. That was until my daughter told me about a student in her 4th grade class that made Chia pudding for the class snack, and the kids loved it (they called it fish eye pudding). It caught my attention, and I had to make some.

You may have heard of Chia Seeds before. Remember those terra cotta heads you would rub the seeds onto, water them, and the hair or beard would grow? These are the same seeds except now they are not just for gag gifts. They are supposed to be good for you with lots of  Fiber, Omega 3, and Protein.

Chia Seed Pudding

Chia Seed Pudding Recipe

Ingredients:

  • 1/4 cup Chia Seeds
  • 1 cup coconut milk
  • 1/4 cup honey
  • 1 tsp. of vanilla extract

Directions:

Add all the ingredients into a  bowl, stir to mix well, pour into serving dishes. Put into the refrigerator to chill for approximately 2 hours.

Chia Seed Pudding Chilling in the Refrigerator

Chia Seed Pudding Chilling in the Refrigerator

I even tried some before it got cold and it was pretty good. It tastes kind of like tapioca pudding with a little crunch.

I have friends that add Chia Seeds to yogurt, smoothies, salads, and baked goods to give them an extra nutritional boost.

Have you ever made anything with Chia Seeds? Leave me a comment I would love to hear your thoughts.

P.S. I was not asked to write this post, I just thought the seeds were interesting.

Happy Mother’s Day

Happy Mother's Day

Happy Mother’s Day to all those that are Mom’s!

To those that have children, or been a

Mama to someone who needed you.

Enjoy Your Special Day!

Tamara

Ladybugs On My Arm

Wordless Wednesday

Letting the ladybugs go in my yard

letting the ladybugs go in my yard

Natural Pest Control

Ladybugs eating the pesky aphids on my plants

ladybugs eating pesky aphids
Click on image to see full size


Happy 1st Day of May Ladybug © Tamara Maellaro

Tamara Maellaro

All We Need is LOVE

I’ve been  thinking about Valentine’s Day decor and I had to have some of these

Wordless Wednesday

Picture of candy hearts with words

My Not So Perfect Rag Wreath

Hello Friends,

I wrote this post last year and thought it might be good to post again. I was looking for this wreath in my closet so I could hang it back up  (thinking about Valentine decor). I might just have to make another one because I could not find the one in these pics. 

I was recently asked by my online friend Denise, over at Sun Kissed Studio if I would like to join in on the “Craft O’ The Month Party” I said “sure why not”. I’m in, I will make a craft. The craft this month was to make a Valentine Themed Rag Wreath. I’ve never made a rag wreath, nor had I ever seen one before.

Thank goodness for Roundy Rounds post on how to make a Rag Wreath. She had great instructions with beautiful pictures of her colorful wreath. I had no problems knowing what supplies I needed or how to make the wreath after reading her post. No wait, Roundy Rounds had the pretty pictures and she  had a link to this post that gave me the instructions with pics.

Off  To The Store I Go

I got my inspiration for the fabric I chose by viewing  this blog.

I walked around the fabric store forever looking for the perfect mix of colorful valentines fabrics before I decided to pick a nice “ivory”. I got the fabric at $3.99 yd which was 50% off. I think it was drapery lining fabric or something, you’d think I’d know since I grew up in fabric stores. I did know it was pretty, with a bit of a sheen, and it was cheap, no I’ll say inexpensive.

Next I was off to find the wire frame. I was shopping at Jo Anne’s Fabric store and they had the wire wreath frame for $1.49 for the 12″ wreath. Oh, and I got some red satin ribbon too. Which by-the-way I didn’t end up using.

Supplies – 12″ wire wreath and 1 1/2 yd. of fabric for  less than $10

I Went Right Home and Started Making My Wreath

Step 1 – Cut the strips of fabric. I made mine around 2″ x 18″, as you can see I didn’t worry too much about them being perfectly straight. Maybe I should have worried about that, but I didn’t.

Step 2 – Take one fabric strip wrap it around the wreath and tie a knot like this.

Keep wrapping and tying bows until your wire frame is covered. When you think you are done you will probably need to add more. At least that is what happened to me.

Step 3 – Now to add something special to my wreath. Right now to me it looks like a shaggy round thing that’s not so special and needs a little love. Ah ha, that’s it, I will add a little love.

So I got out some copper wire from my beading stash.

And then I found a little love heart, leftover from some bridal shower cards I made awhile ago.

I then made a free-form wire heart and attached the LOVE charm to it. I attached the wire heart to the wreath using 1/8″ pink satin ribbon that was sitting in my craft cupboard waiting to be used.

My Wreath Still looked kind of sad and blah. I wanted it to be very simple, but I didn’t want blah.

I thought for a moment, and back to my bead collection I went. After going through  my beads I decided on a few Swarovski crystals. Everything looks better with a little glimmer, don’t you think?

I think the few crystals helped a lot. When the wreath is on my wall without the crystals, you couldn’t see the heart in the center it just faded into the wall. The crystals gave it just a bit of pop so it brought your eye to it.

It was really hard taking a good picture of my finished valentine wreath on my wall. The lighting was not my friend and my picture taking skills, well let’s just say I’m not a pro. I used my handy dandy iPhone that’s cool isn’t it LOL.

Drum Roll Please ……..XXXXX……

Here is a picture of MY NOT SO PERFECT RAG WREATH

Every time I walk by this wreath I play with all the bows trying to make them even/perfect. Then, it came to me that the beauty of this wreath is it’s not perfect. Now I’m happy with my little valentine rag wreath just as it is.

I can’t wait to see all the other wreaths everyone made. I hope you enjoyed this post. I would love to hear from you. Please feel free to leave a comment.

Happy Crafting,

Tamara

Caprese Salad Bites

Perfect Holiday Appetizer

CapreseSaladBites copy

Ingredients

Grape or Cherry Tomatoes
Mozzarella Balls (size of cherry tomatoes)
Fresh Basil leaves
3 TBS Extra Virgin Olive Oil
1 1/2 TBS Balsamic Vinegar (if you don’t like the dark color use white balsamic)
Coarse Salt
Pepper
Dried Oregano
Toothpicks

The measurements given are estimates, I never measure when I make this.

Start by whisking in a bowl the EVOO (olive oil), Balsamic Vinegar, pinch of salt, pinch of pepper, and a sprinkling of oregano.

Cut the tomatoes and mozzarella balls in half. Cut the basil leaves into small pieces as shown in the picture.

Assemble

Pour the olive oil mixture onto a pretty plate. Next put a piece of the basil on toothpick followed by the mozzarella and tomato. Make sure the tomato has the cut side facing down so it sits on the plate well and soaks in the wonderful flavor of the oil mixture. Continue until all your tomatoes and mozzarella are used up.

If desired drizzle a little bit of EVOO on top, then sprinkle a pinch of salt over the top along with a pinch of oregano for color.

Cover with cling wrap and put into the refrigerator until ready to serve.

This recipe is always a big hit everywhere I take it. Its light, refreshing, and a nice break from all the heavy holiday dips and such.

Bon Appétit

https://i0.wp.com/billygorilly.com/blog/wp-content/uploads/2012/05/MySig-font.png

Roasted Butternut Squash Soup

Soup for a Cold Winter Night!

I had a butternut squash sitting around for 3 weeks and I wasn’t sure what I wanted to do with it. When I bought the squash I wasn’t paying attention and thought I bought a spaghetti squash, OOPs!

I decided to make soup and went in search of a recipe. I found a recipe by Andrew Weil on a Martha Stewart video.

I modified my recipe slightly and I have to say it came out delicious. My husband loved it too. The roasted vegetables makes all the difference by giving it a rich earthy flavor. I give you a printable recipe at the end of the blog.

Start with a clean 2-2.5 lb. butternut squash. Cut it in half lengthwise.


Next use a spoon to scoop out the seeds.


Peel the skin off the butternut squash. I also added 1 small sweet potato with skin removed. I just didn’t take a picture of it.

Next you want to…

Cut the squash into chunks.
Quarter 2 onions
Clean 4 cloves of garlic and leave whole

I also peeled and cut into chunks 1 small Jazz apple because that is what I had. I placed everything into a roasting pan. I had the oven preheating at 400 degrees F

I seasoned the vegetables with 2 tbs. of (EVOO) extra virgin olive oil
1/4-1/2 tsp of powered chili powder ( this is my best guess, I never measure)
Pinch or so of Chili Pepper
1/4-1/2 tsp White Truffle Sea Salt. You could use any salt you like.

Mix the seasoning into the vegetables evenly.

Roast the vegetables for 40-50 minutes stirring every 15min. until fork tender.

When the vegetables are done take out of the oven and place into a stock pot.

Add 4 cups of Organic Low-Sodium vegetable stock to the pan. I then pureed the vegetables with an immersion mixer. You could also puree in a food processor. Warm the soup in the pan to desired temperature.

To serve I added a sprinkling of parmesan cheese, a dollop of sour cream, and a pinch of oregano for color. The soup tasted amazing and made the house smell wonderful.

Have you ever made butternut squash soup?

I hope you enjoy!

Print Recipe